Friday, 7 December 2012

Kidz got talent

Early last year I was having a go at
Decoupage, as you will have seen if you have had a look through my blog before!

This time a card for my eldest nephew
not the best of photo's, can't really see that image is decoupaged, and I only took one photo!


Image: Kidz got talent but I can't remember where I got it (will update later when I find out)
Cut out and used sticky pads to raise image
Background card printed - Stars, download from Funky Fairies (site no longer available)
Printed wording & number on Computer
Glitter background card from stash
Black inkpad to edge silver edges 

Monday, 3 December 2012


Hello, I'm back again!

You might say the same about the image, but it's one that I 
just love to colour, and so good for any age of Male Birthday Cards!  
Maybe next year I might have another bear from Di's Digi website.


Image:  Beer Bear, Di's Digi Downloads
Prisma Pencils
Nesties - Star's
Number 40 - Sizzix night & Day alphabet/number set
Silver Ink Pad to edge black card
Computer printed sentiment


Friday, 30 November 2012

Good Evening

Eh me, Jack Frost is out the night!  Was out out for a long run, and there was quite a few icy patches on the pavements, and a few squeaky oooooh's as I was running, but I kept my footing, and home to post a card for you!


This is image of a male in a Mauy Thai pose (martial art)
just a simple male card.

Thanks for looking
x


Wednesday, 28 November 2012

Byzantium Band


Beading Ingredients
Nymo or Fireline
Silver Lined Seed Beads (11/0)
Lilac Glass Pearls (4mm)
 Bicone Crystal (4mm)
Fire-Polished bead - crystal (3mm)
Magnetic Silver plated clasp

Deborah Roberti pattern


Sunday, 25 November 2012

Art Deco Birthday

Why do weekends pass so quickly?  
Think I will have Monday-itis tomorrow,
 not worked on a Monday since  the middle of October!  

Get on with the post, tonight I have another Decoupage card I did at the beginning of last year.  Unfortunately my Disk Drive of computer is unwell, so have been unable to use the Debbie Moore Disk that I got this image from, maybe one day


Image - Printed from a Debbie Moore Design CD
Cuttlebug Swirls embossing folder
Eyelet circle nestie
Sentiment printed on computer
Ribbon & Gem 

Good Night.

Saturday, 24 November 2012

Emily & Emile's 1st Birthday

Good Evening

Well near the end of November, and I really haven't been good
at blogging this month (nothing new really).  When on computer now, it's Christmas Shopping, reading emails or should I say deleting emails, catching up on Craft Blogs, and of course pinterest!   However, tonight I have resisted all, especially to give you a new card (or two), all be it from 2011!


Emily's Birthday Cake


Ingredients
Image - Digital Stamp Boutique - Emily with Cake
Prisma Pencils to colour
Nestie Circle, and eyelet circle
Computer to type sentiment
Cuttlebug embossing folder
Flower and leaf paper punch
Glitter, Ribbon, Gems 


Emile's Birthday Cake


Ingredients
Image - Digital Stamp Boutique - Emily with Cake
Prisma Pencils to colour
Nestie Circle, and small star

Computer to type sentiment
Cuttlebug embossing folder
Very Small Star Paper Punch
Glitter Paper

Thanks for looking!

Sunday, 18 November 2012

Hearts, Hearts, Hearts (continued from Sneak Peak)

Hi there, I was teasing you a few weeks ago (maybe I should say months ago) with a sneak peak.  Seen this on other blogs, and 
thought I would do the same.......

......... why not?


Well I am back today to let you know what I have been up to!
One of my friends was getting married, she wanted to make her own wedding stationery, but after purchasing the card, ribbon, gems etc I had an SOS phone call.  She had handcut out a heart - but didn't feel it was good enough to stick on front of the invites.  I had to agree with her, she wanted to know how I cut hearts.  So I volunteered to rescue her, by agreeing to cut, print and fold, as she still wanted to be the Bride that made the invitations.

My job - Cut 200 hearts of each size, (so there was 600 hearts)
print the inserts
and cut/fold card to size.

And now....

... a guest designer.....

Mrs K Sim.... aka the Bride....


What do you think?
For someone who has never made cards - she has done a good job!


So, once I was finished, there was a few offcuts
and below is a picture I made for the Happy Couple.

I only have a photo of the end result - before it was framed!!


ingredients:  4 different embossing folders,
 computer for wording,
 flower punch,
 butterfly punch
 1 gem


Friday, 16 November 2012

85th Birthday Easel


Good Evening

How's everyone tonight?  I've finally started making my Christmas Cards last night, 
after a wee bit of playing about, production line is now well under way,
I just need to keep up the good work.  Time for a cuppa, so 
thought I better post a blog and be sociable!

Unfortunately the light wasn't brilliant
when I took the photos of this card.


This has been one of that cards that I keep making
and have done so for various occasions, in various colours, so similar cards to follow 
when I get round to blogging them!

List of Ingredients

Easel Card from Clip Art Fairy - which I have altered colours using Desktop Publish
Sentiment typed on computer
Numbers cut using Sizzix dies, embossed using crafts too embossing folder
Two tone Ribbon, Gems
Border Punch - xcut diamonds
Flowers, leafs various punches and marianne creatable dies
Pink ink to edge card

Hope you likey!
x

Sunday, 11 November 2012

Armistice Sunday


Good Morning.

Not managed to Blog for some time, so have made a special effort for
this post.  I made this Poppy last year,  and feel that it has to appear on my blog today, Armistice Sunday.

Thinking of everyone in the Forces,
 who fought (or still fights) for our country, 
those who made it home to tell the tale, 
and those that weren't so lucky, 
our thoughts are with your family 
whom think of you with a sorry heart but with great pride.


The finished Poppy.  
The top picture does not give the true colour of the silver lined red seed beads, below is more how it looks to the naked eye!

Thanks for Looking and hope to be back soon with more posts this month!
Take care
x

Monday, 15 October 2012

Marshmallows!

 My word, it's Monday evening already!  It ain't have getting dark early now. 
 I do enjoy in the dark winter nights,  to do something crafty.  

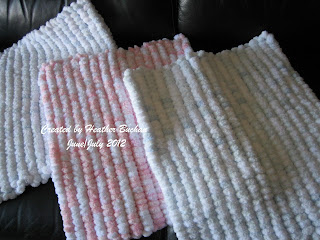
 Today's post is of some knitting I did three blankets earlier in the year, 
as you can see 2 boys and a girl!


I was calling them pompom blankets, but I overheard a young
mum the other day say Marshmallow Blanket! 

I think I will get more of this wool
really easy to knit up, and every parents that 
I have given this too have been absolutely delighted with.  

Have a good night, and hope to be back again real soon. 
x.


Sunday, 14 October 2012

Romeo! Romeo! Where thou art...


...Romeo, eh me,  I can't remember what comes next!  It has been a long time since I did Shakespeare at school!  This image from Lily of Valley did remind me of my vision of Romeo & Juliet.  

I have inserted 2 images of the card, taken from different view so you can see the wording down the side (which to be honest was a mistake when I folded the card, so fixed it by printing Husband down the edge)


Image:  Lily of Valley (this was freebie image that was in a free gift from Papercraft inspiration)
Prisma Pencils to colour
Distress Ink to edge
Marianne Creatable Heart Die
Circle Nesties
sentiment printed on computer 
 hand cut the flags, and attached to gold thread and stuck on with sticky pads
Glitter to finish the rose


Friday, 12 October 2012

Cuppa, Feet Up......


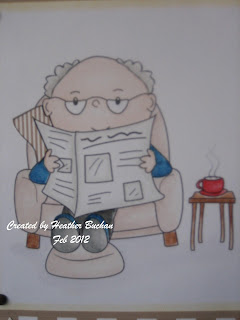
............  and catch up with the papers, and probably have a forty winks and think no one will notice!  Well that's what my Granda does, so this image couldn't have been choice!

I'm so lucky to be at my age, and still have 3 grandparents.  Granda is the eldest, and he reached the Grand old age of 90 back in February.  He is absolutely amazing health wise, and such a lovely man!  So hear is my creation, I just wish I had had a bit more time with his card, but nothing unusual me running at last minute with important cards!


How clever is Digital Stamp Boutique to get such a great picture of my Granda? 
 It is so like him, all the family had a great big smile, and  I was asked several times  if I drew the picture, I wish I could!!   

below is a close up of the picture


Ingredients
Digital Stamp Boutique: Granda Relaxing
Coloured: Prisma Pencils
Background Paper: Pink Petticoat Stripes (Mocha)
Sizzix Number - cut on Pink Petticoat, doodle dots paper
Nestie Star
Cuttlebug Swiss Dots Embossing Folder
Sentiment printed on Computer
Brads
Paper pieced the cushion with stripe, pink petticoat paper.


For his birthday I had the job of arranging the cake for the party,  from all the grandchildren.   I had asked for decoration to be slippers, newspaper and glasses, unfortunately they gave me a cute wee gardening bear - which would have been ideal if the grandchildren were children, the youngest of us is 19 or 20 year old.  So I wasn't happy, I was more annoyed that they didn't phone to tell me, as I had ordered it weeks before and could have bought something myself, but with no time for shopping I printed another one of the image,  cut out using circle nestie, then laminated and cut with circle nestie and placed it on the corner of the cake.

The finished article

And finally, the great man, himself getting ready to cut the cake!  
Happy 90th Birthday Granda!!


Thursday, 11 October 2012

Thursday Already, where has the week/month gone?


Good Evening all.

 Well, I'm doing not too bad another Blog so soon after yesterday, 
must admit, I have been feeling guilty of not being around lately.

So today's post is Beading, I so enjoy going to the group, it's such a great 
bunch of girls, we have a laugh, and the beading is so relaxing
 well,  once you grasp the pattern.

Skinny Bracelet II


Ingredients
 Around the Beading table
Beads: Seed Beads
4mm Fire-polished beads
4mm bicone crystals
beading thread and clasp 
.
.......

Wednesday, 10 October 2012

Snuggles

Sorry for not posting these past few weeks, real life has taken over, again.
  Have had a busy 2 weeks,  one of which I was off work on holiday, you'd have thought I might have managed to catch up with blog land, but that didn't happen, mind you, nor did half the jobs on my to do list!  Where does time go??  Then last week I had to adapt with being back to work, and it was a busy week of Birthdays, and Anniversaries so that meant some partying and visiting!  I think I need another holiday.  Ha ha, if only :-)

I better get on with the post, this is a Less is More style Anniversary card which I had made last year using another cuty Penny Black Stamp!


Ingredients: 
A4 White Card cut & folded to square card blank.
 Penny Black Stamp - Snuggles
Prisma Pencils
Lacy Square Nestie
Ink and sponge to edge the Nestie frame
Ribbon & Gem to embellish
Computer sentiment

Hopefully you won't have such a 
long wait for the next post, but I can't promise got another busy week ahead  of me!

Monday, 24 September 2012

Misty

Evening!  

Have been on a "mini-break" as one of my friends would say, 
Hubby and I were away for 1 night,  we stayed in lovely Hotel in Broughty Ferry, Dundee
and today we visited St Andrews!  Had a great time, but blimey it was Brrrr.
  I was thankful I had packed my boots, and gloves - but could
have done with woolie hat too!  The joys of Scottish Weather.

Now that I am home, indoors, nice and warm
it's time to give you a post of the day!

This little beauty was my Niece's birthday card from Last year,
she loves Horses!


And a close up photo
of the Rosette I made! 


Ingredients:
Card: - A4 white card, cut & folded to square easel
Image:  Misty from Digital Stamp Boutique
Coloured: Prisma Pencils
Embossing Folder: Flowers by Crafts Too - on green paper
Wording - Typed on PC
Rosette:  hand made by me using paper, folded into fan and joined 2 ends together, 2 offcuts glued to back and cut into ribbon points.  Also used a small Circle Nestie to finish centre.
Scalloped Fiskars scissors to edge image & wording, both matted & layered.
Edge of card inked
Gems to decorate flower centres.
Horse shoe was drawn and hand cut!

One delighted niece!  


And below
The Gift Tag for her present!

Sorry photo not 100% clear :-(


Additional Ingredients
Oval Nestie - used out of box method
Oval Scalloped Nesties

That's all for tonight folks,  take care if your out and about!

Friday, 21 September 2012

Waste not, want not

You maybe remember an earlier post, I think I headed it I'm not square, well that is where I got the inspiration for this card!

Would you believe this card has been made 
using my off cuts.  


Ingredients:
Base card Easel - made using Labels (nestie)
Tim Holts, distressing ink, Antique Linen
Numbers cut from Sizzix Die, 
then embossed using Crafts Too, budding vine embossing folder
Marianne Creatable dies - flowers and leaf
Also punched flowers and leaf 
Sentiment done on computer
Button & Pearls to embellish


Thursday, 20 September 2012

Sneak Peak

.............What have I been up too?


I will be back soon to let you see what this was for!!  How Cruel amI???

Wednesday, 19 September 2012

Golfer


Good Evening Blogland,

A Quick post of a card I made earlier this year!
This was inspired from Papercraft inspirations magazine 
(sorry, not sure which issue - late 2011/early 2012 at a guess)


Ingrdients:
Golfer - template from Papercraft Inspirations Magazine
Golf Flag - drawn freehand by me
Sentiment typed on Computer
The golf bag - Button
Golf ball - white brad
Grass - Green paper, has been embossed using a fiskars embossing folder
Sky - paper from Pink Petticoat


Tuesday, 18 September 2012

Home Sweet Home

Don't you just hate it when you finish a card, take a step back, and then you see the mistake!  Does it happen to anyone else?  I obviously didn't step back with this card,  the image is not in the centre of the scalloped oval


Ingredients:
Digital Stamp Boutique:  New Home
Coloured with Pro-markets
Nesties ovals, and scalloped ovals
Glitter purple paper
Sentiment on Computer - Bradley hand and Scriptions Fonts
Flowers, leaf cut using paper punches, gem to embellished.

Monday, 17 September 2012

White on White

Good Evening

Hope you are well!  
It's been a mixed bag of weather here in the North East, nothing unusual.  
Glad I went a walk at lunchtime, as it was glorious then, 
 but it was chucking it down at 5pm.

Sympathy Card is not something that I enjoy making,
but as I have this little voice in my head, "I don't buy cards, I can make for any occasion".  I made the below, just to have a card or two in my box.


Ingredients:
Wording done on PC
Nestabilites Labels set (can't remember number)
Cuttlebug Embossing Folder, Swiss dots
Silver ink and Ribbon

Saturday, 15 September 2012

Art Deco

Yee Ha!  It's the weekend again, and it's been a glorious weather today,
feel so much more cheery when the sun shines!

Tonight's card is another from 2011 that
I am slowly adding to this digital diary.

A Different Technique too!


The next picture is a close up of the Pyramid effect, but as you see my photographic skills are not very good, a bit blurred :-( 


Ingredients:  
Cream Base Card
Debbie Moore Designs, Glitter & Glitz CD -Pyramid Magic
Purple Card - Embossed using Cuttlebug Embossing Folder - Swirls
Oval and Scalloped Ovals Nesties
Sentiment typed on PC
Ribbon, cord and gems 
Silver ink to edge
Black Card

Hope you enjoy the weekend, 
Good Night
x

Friday, 14 September 2012

Hermatite & Firepolish Bracelet

Good Evening

Thought it has been a while since I
Posted some beading, so here is another finished project that I
made at my local beading group.


I like the above picture, as you can clearly see the square shape
that was made with seed beads - the original pattern was for Tube Beads, but 
this seemed to fray the thread, so we had to adapt the pattern!

Ingredients: 
Pattern:  Hermatie & Firepolish Bracelet from Foxden Designs
distributed by Bead-Patterns.com
 size 11, Seed Beads
size 3mm, Fire Polish 
Beading Thread
Magnetic Clasp

I hope you  like it!  

Thursday, 13 September 2012

Forever Friends, Christening Time

 Good Evening,

A quick post, with Christening cards
they are both Clean and Simple styled cards, and for a change I have
gone with DL size card.


Ingredients:
Stamp:  Forever Friends Stamp - Christening
Stamped in Grey Ink
Coloured with Prisma Pencils
Chalked around the the edge of Oval Nestie, and Scalloped Nesties
Wording on PC - Bradley Hand Font
Ribbon 

and below are 2 more cards 
the same but, sentiment changed!


Tuesday, 11 September 2012

A New Pad...

Good evening,

Multi-tasking at the moment, typing Post and cooking supper.  Well supper is cooking and I am keeping an eye/ear on it - already had to run as tatties were boiling over, but they never ever do that when I am in the Kitchen, I wander why?

So won't waffle too much, don't want burnt supper!

A New Home card - went for a totally different colour scheme, bright and vibrant!

.... New Home card


Ingredients: 

Digital Stamp Boutique: Image Bob & Benji
Colour:  Prisma Pencils
Background paper:  Lime Green from stash, Gingham was printed from CD Rom 
 (can't remember but will find out & update later)
Sentiment generated on Computer.

Monday, 3 September 2012

Double Trouble - 1st Birthday

Where has the evening gone, went for a run, supper, shower, and I've still not done
my dishes, but yet I have time to post - but I'll make it quick!

Two 1st Birthday cards
as you can see one for boy, and the other for a girl


Ingredients: 
Digital Stamp Boutique Image: Age 1 Boy Teddy/Age 1 Girl Teddy
Prisma Pencils to colour
Nesties - Labels set (not sure of number)
Boy Card - Happy Birthday Background Paper from craft creations
Swiss Dots Embossing Folder

Girl Card: Flowers Crafts Too embossing Folder
Ribbon and Gems from stash

Good Night
x