Friday, 7 December 2012

Kidz got talent

Early last year I was having a go at
Decoupage, as you will have seen if you have had a look through my blog before!

This time a card for my eldest nephew
not the best of photo's, can't really see that image is decoupaged, and I only took one photo!


Image: Kidz got talent but I can't remember where I got it (will update later when I find out)
Cut out and used sticky pads to raise image
Background card printed - Stars, download from Funky Fairies (site no longer available)
Printed wording & number on Computer
Glitter background card from stash
Black inkpad to edge silver edges 

Monday, 3 December 2012


Hello, I'm back again!

You might say the same about the image, but it's one that I 
just love to colour, and so good for any age of Male Birthday Cards!  
Maybe next year I might have another bear from Di's Digi website.


Image:  Beer Bear, Di's Digi Downloads
Prisma Pencils
Nesties - Star's
Number 40 - Sizzix night & Day alphabet/number set
Silver Ink Pad to edge black card
Computer printed sentiment


Friday, 30 November 2012

Good Evening

Eh me, Jack Frost is out the night!  Was out out for a long run, and there was quite a few icy patches on the pavements, and a few squeaky oooooh's as I was running, but I kept my footing, and home to post a card for you!


This is image of a male in a Mauy Thai pose (martial art)
just a simple male card.

Thanks for looking
x


Wednesday, 28 November 2012

Byzantium Band


Beading Ingredients
Nymo or Fireline
Silver Lined Seed Beads (11/0)
Lilac Glass Pearls (4mm)
 Bicone Crystal (4mm)
Fire-Polished bead - crystal (3mm)
Magnetic Silver plated clasp

Deborah Roberti pattern


Sunday, 25 November 2012

Art Deco Birthday

Why do weekends pass so quickly?  
Think I will have Monday-itis tomorrow,
 not worked on a Monday since  the middle of October!  

Get on with the post, tonight I have another Decoupage card I did at the beginning of last year.  Unfortunately my Disk Drive of computer is unwell, so have been unable to use the Debbie Moore Disk that I got this image from, maybe one day


Image - Printed from a Debbie Moore Design CD
Cuttlebug Swirls embossing folder
Eyelet circle nestie
Sentiment printed on computer
Ribbon & Gem 

Good Night.

Saturday, 24 November 2012

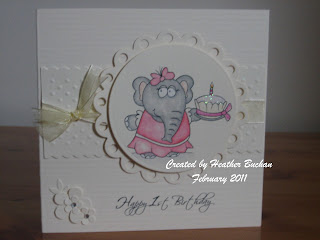
Emily & Emile's 1st Birthday

Good Evening

Well near the end of November, and I really haven't been good
at blogging this month (nothing new really).  When on computer now, it's Christmas Shopping, reading emails or should I say deleting emails, catching up on Craft Blogs, and of course pinterest!   However, tonight I have resisted all, especially to give you a new card (or two), all be it from 2011!


Emily's Birthday Cake


Ingredients
Image - Digital Stamp Boutique - Emily with Cake
Prisma Pencils to colour
Nestie Circle, and eyelet circle
Computer to type sentiment
Cuttlebug embossing folder
Flower and leaf paper punch
Glitter, Ribbon, Gems 


Emile's Birthday Cake


Ingredients
Image - Digital Stamp Boutique - Emily with Cake
Prisma Pencils to colour
Nestie Circle, and small star

Computer to type sentiment
Cuttlebug embossing folder
Very Small Star Paper Punch
Glitter Paper

Thanks for looking!

Sunday, 18 November 2012

Hearts, Hearts, Hearts (continued from Sneak Peak)

Hi there, I was teasing you a few weeks ago (maybe I should say months ago) with a sneak peak.  Seen this on other blogs, and 
thought I would do the same.......

......... why not?


Well I am back today to let you know what I have been up to!
One of my friends was getting married, she wanted to make her own wedding stationery, but after purchasing the card, ribbon, gems etc I had an SOS phone call.  She had handcut out a heart - but didn't feel it was good enough to stick on front of the invites.  I had to agree with her, she wanted to know how I cut hearts.  So I volunteered to rescue her, by agreeing to cut, print and fold, as she still wanted to be the Bride that made the invitations.

My job - Cut 200 hearts of each size, (so there was 600 hearts)
print the inserts
and cut/fold card to size.

And now....

... a guest designer.....

Mrs K Sim.... aka the Bride....


What do you think?
For someone who has never made cards - she has done a good job!


So, once I was finished, there was a few offcuts
and below is a picture I made for the Happy Couple.

I only have a photo of the end result - before it was framed!!


ingredients:  4 different embossing folders,
 computer for wording,
 flower punch,
 butterfly punch
 1 gem